
| ||
Tue 2026-06-16
Mon 2026-06-15
Sun 2026-06-14
Queer Fascism and the End of Gay History Sat 2026-06-13
Fri 2026-06-12
Thu 2026-06-11
Wed 2026-06-10
Mon 2026-06-08
Search
Archives
2024
12 11 10 09 08 07 06 05 04 03 02 01
2023
2022
2021
2020
2019
2018
2017
2016
2015
2014
2013
2012
2011
2010
2009
2008
2007
2006
2005
2004
2003
One good site
MDN
Nelson Minar
Blog licensed under a Creative Commons License
|
Photographs in extreme lighting are a compromise. Either the
highlights are overexposed or the shadows are underexposed. But with
HDR techniques you can take multiple photos at different exposures,
then combine them into a normal image with fine local control over exposure.
It's a bit like the Shadows/Highlights adjustment, only
with real data instead of fakery.
Photoshop CS2 makes HDR easy for normal people. Some intro material on HDR can be found in this tutorial and this article. The HDR Flickr Group is fun, too. 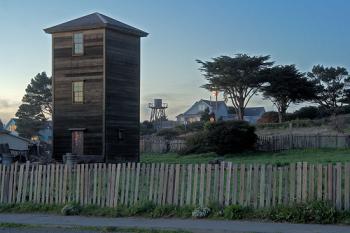
As seen on BoingBoing.
|
|
